Step-by-step guide for clients booking appointments with their specialists
📱 Starting the bot and first booking
1 Start the bot
Follow the link your specialist sent you and tap the "Start" button. The bot will automatically link you to your specialist.

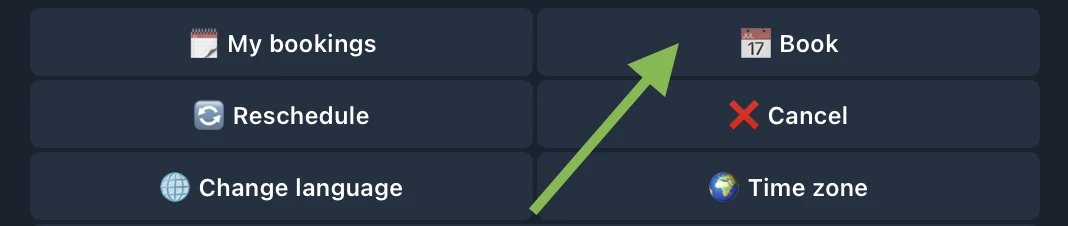
2 Tap "📅 Book"
In the bot menu, select the "📅 Book" button to start the booking process.
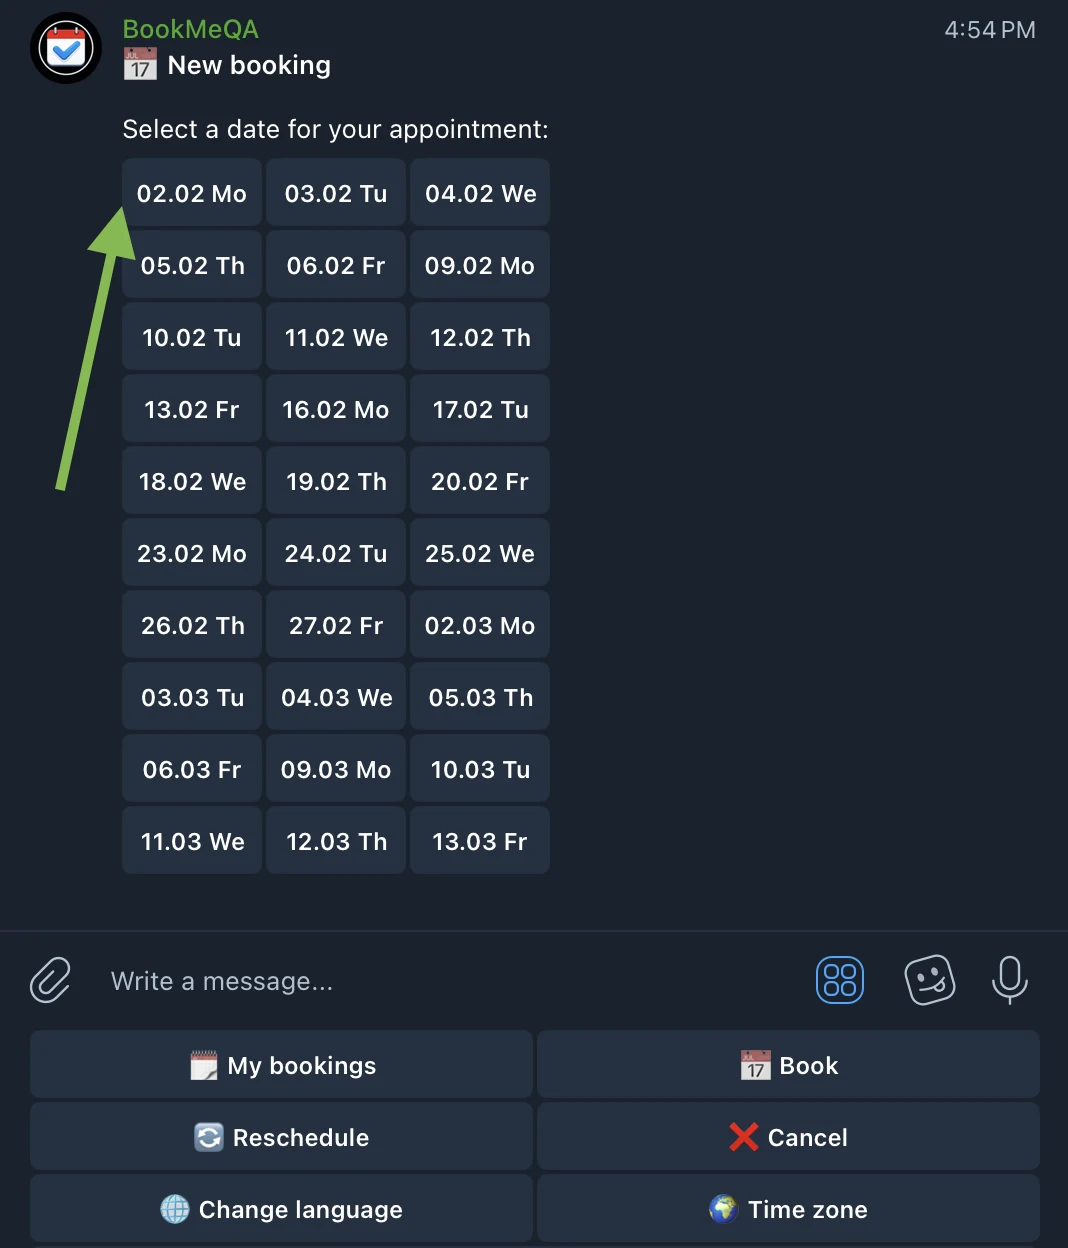
3 Select a date
The bot will show available dates for the next month. Choose a suitable day from the list. Only days with available slots are displayed.
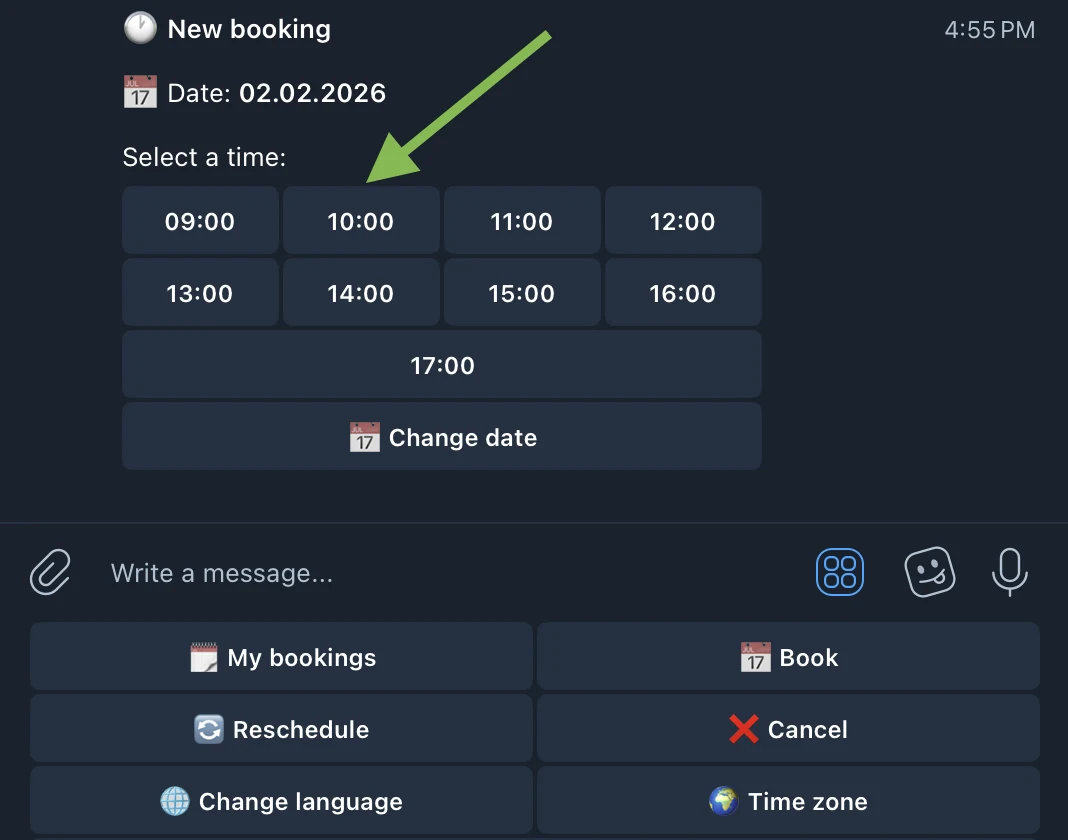
4 Select a time
After selecting a date, the bot will show available time slots. Choose a convenient time for you.
5 Done!
After selecting a time, the booking is automatically created. You will receive a confirmation with booking details.
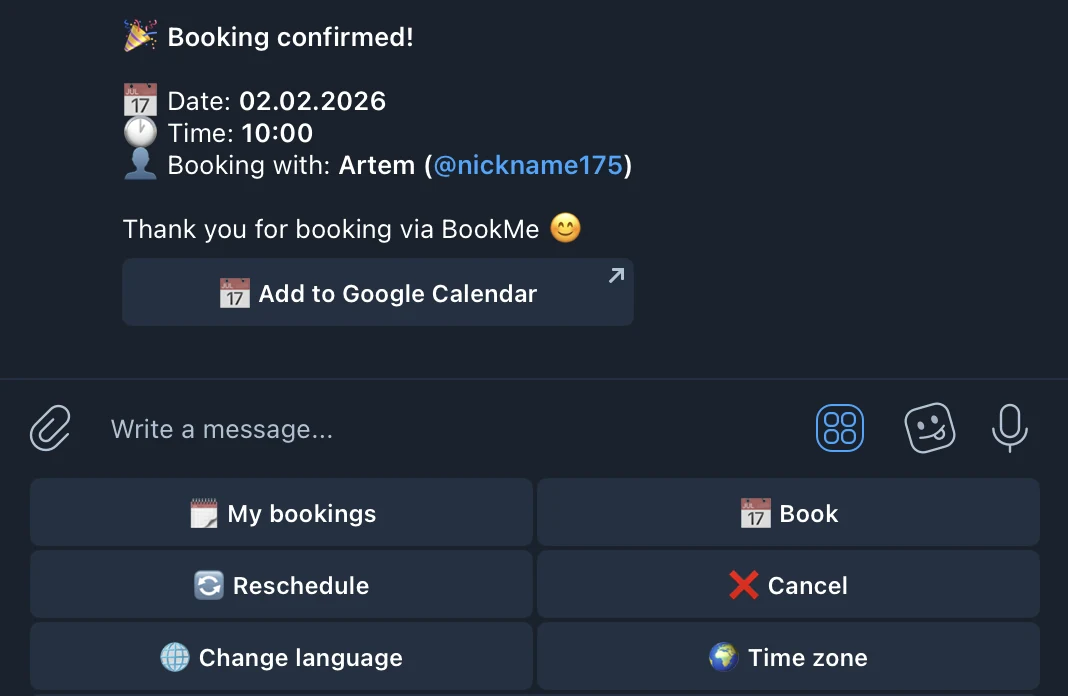
💡 Tip
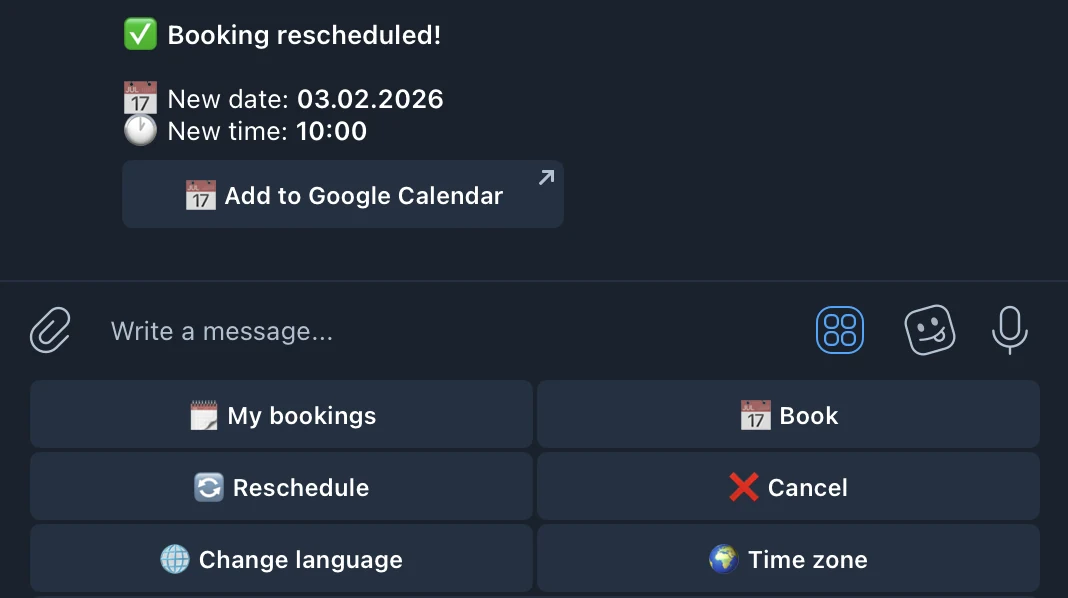
After confirmation, you will receive a link to add the booking to Google Calendar. Also, 10 minutes before the session, the bot will send you a reminder — so you won't forget about your booking!
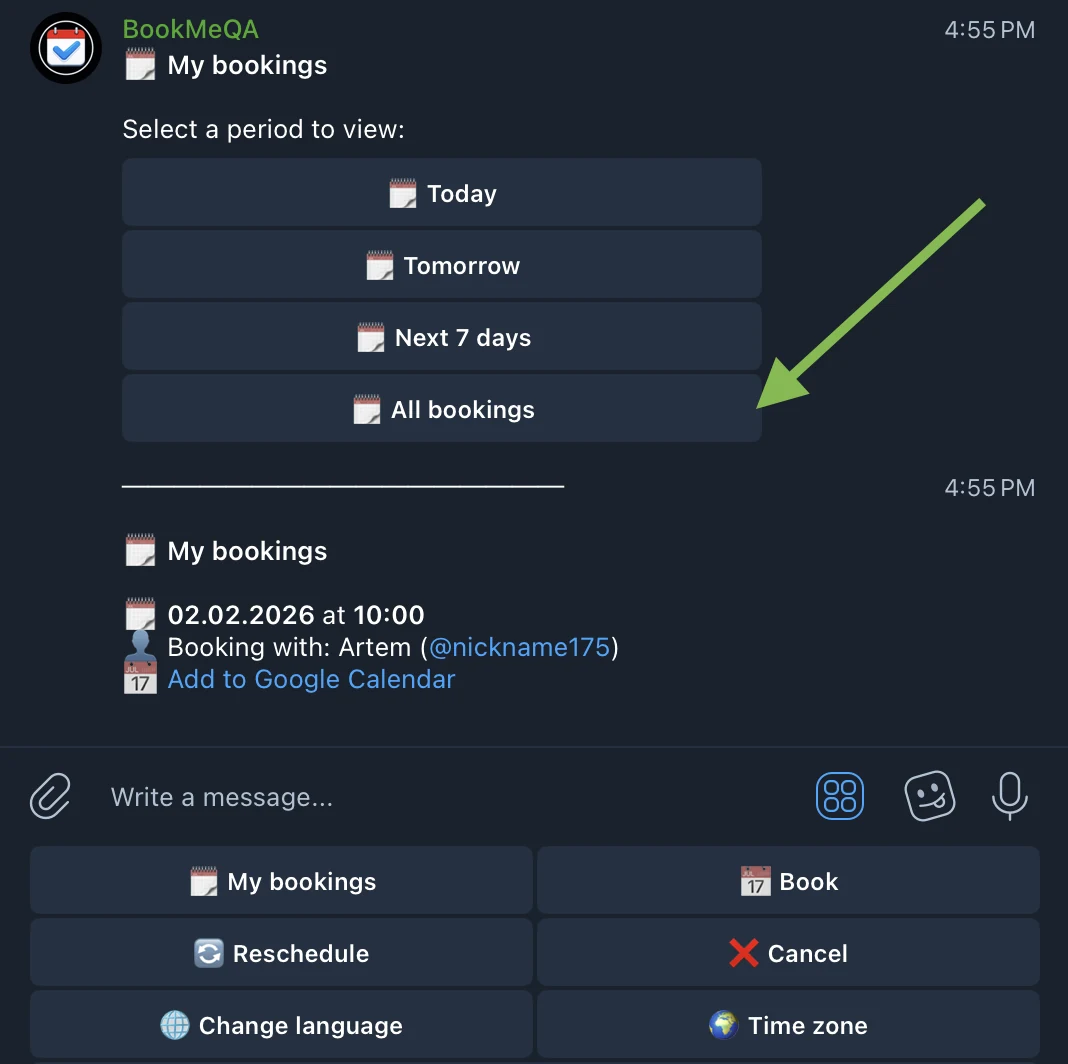
🗓 View bookings
To view your upcoming bookings, tap "🗓 My bookings" in the menu. Select a period and you will see a list of all active bookings with date, time, and specialist name.
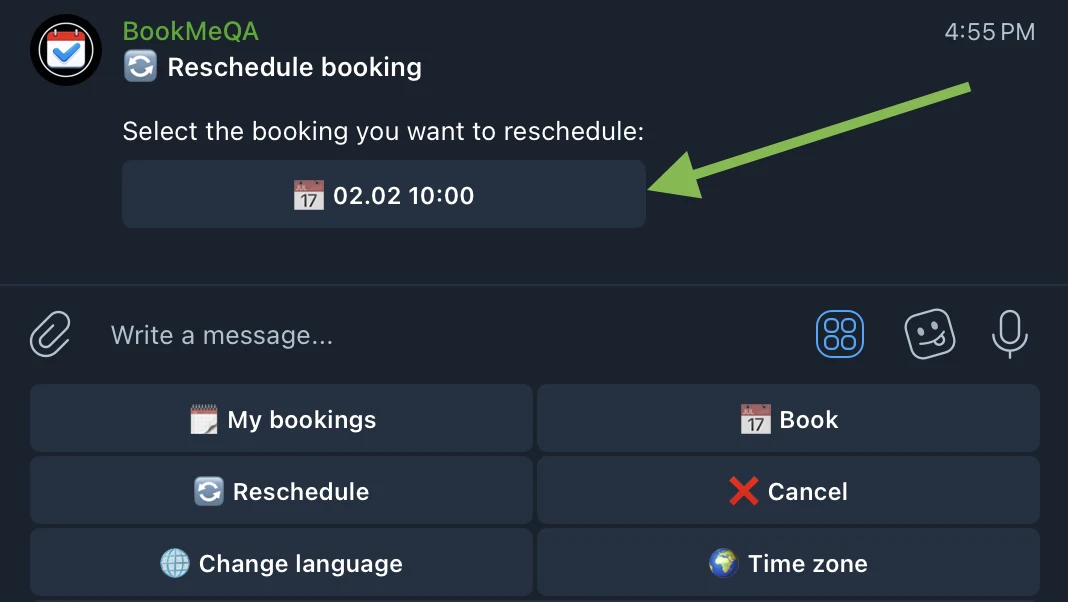
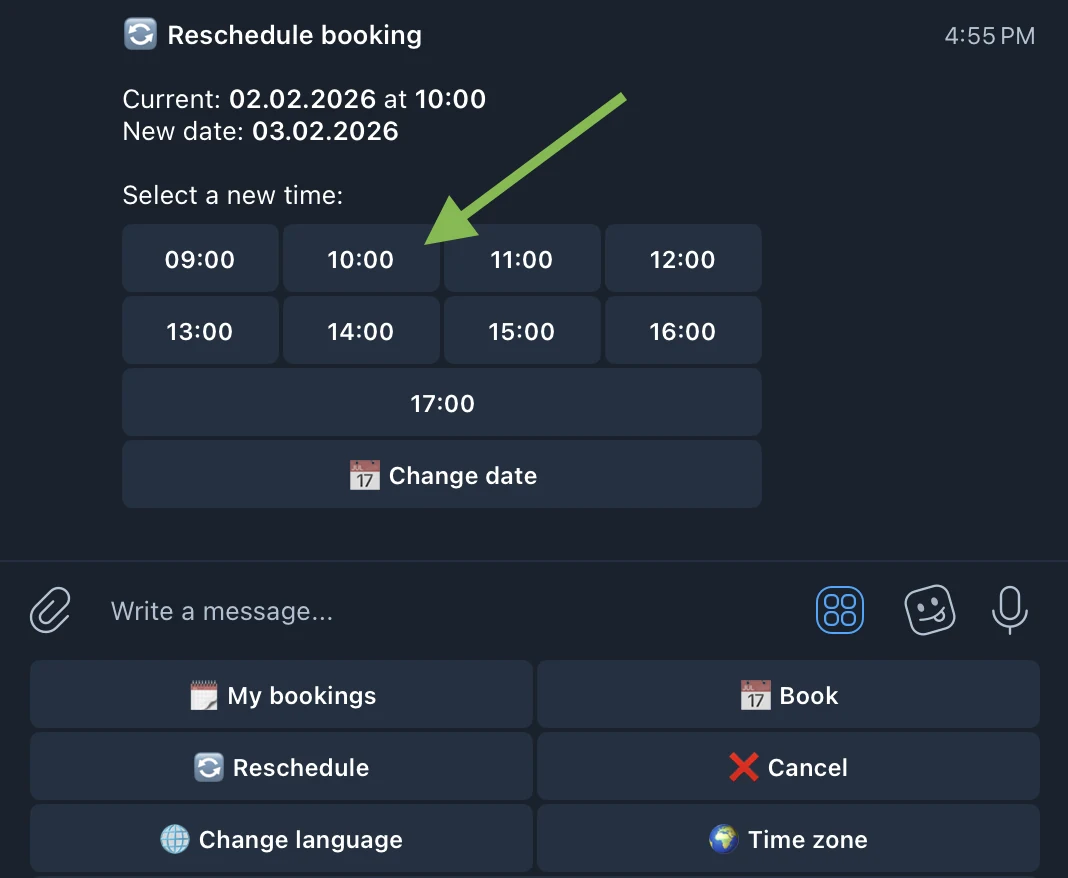
🔄 Reschedule booking
1 Tap "🔄 Reschedule" in the menu and select the booking you want to reschedule.
2 Select a new date from available options.
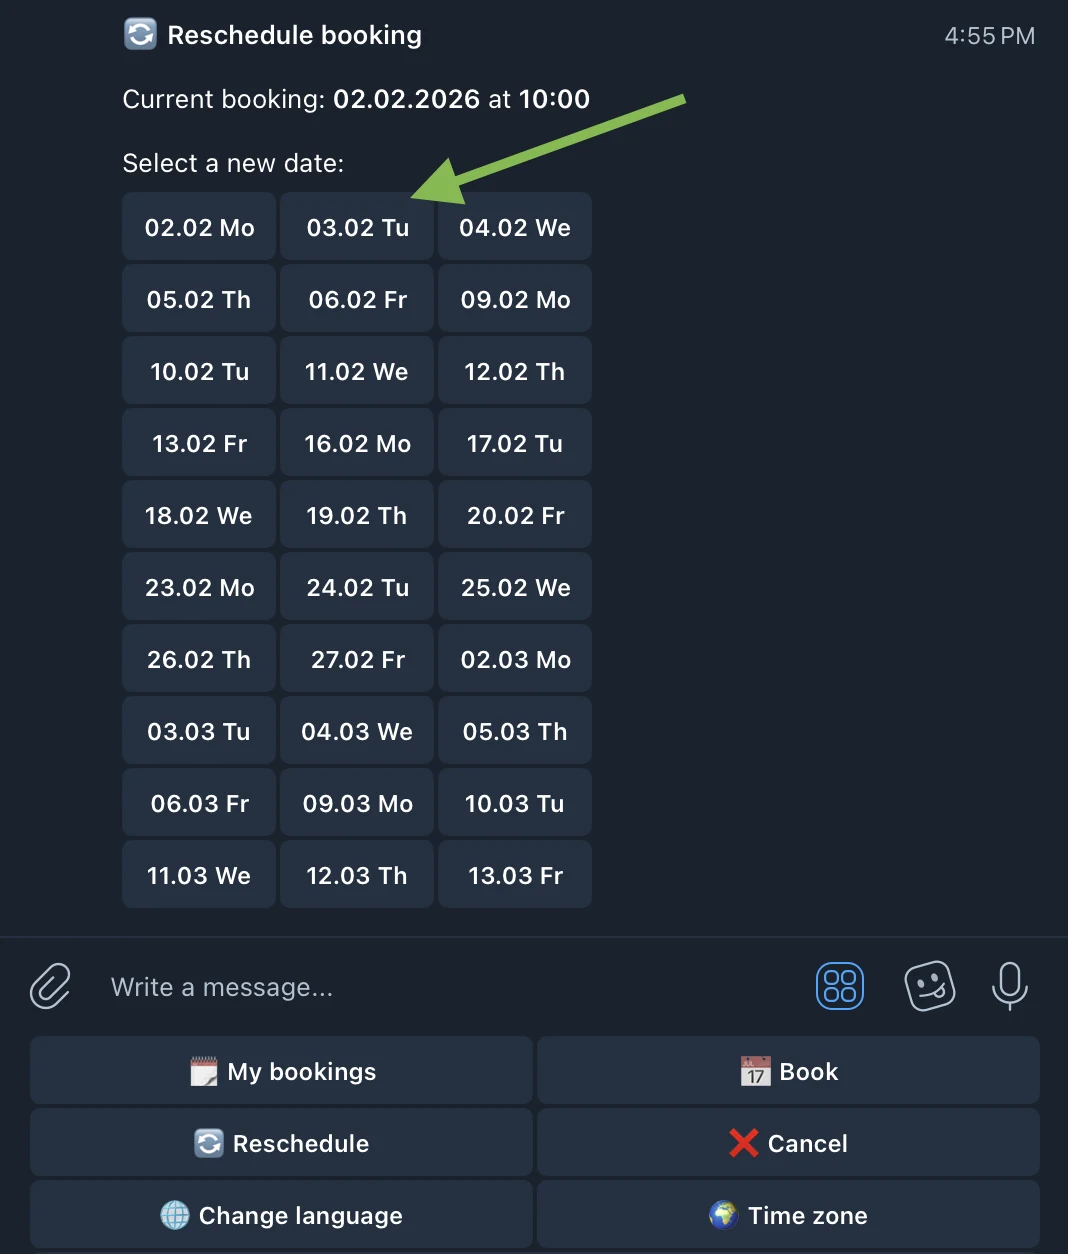
3 Select a new time.
4 Done! Booking rescheduled. You will receive a confirmation with new details.
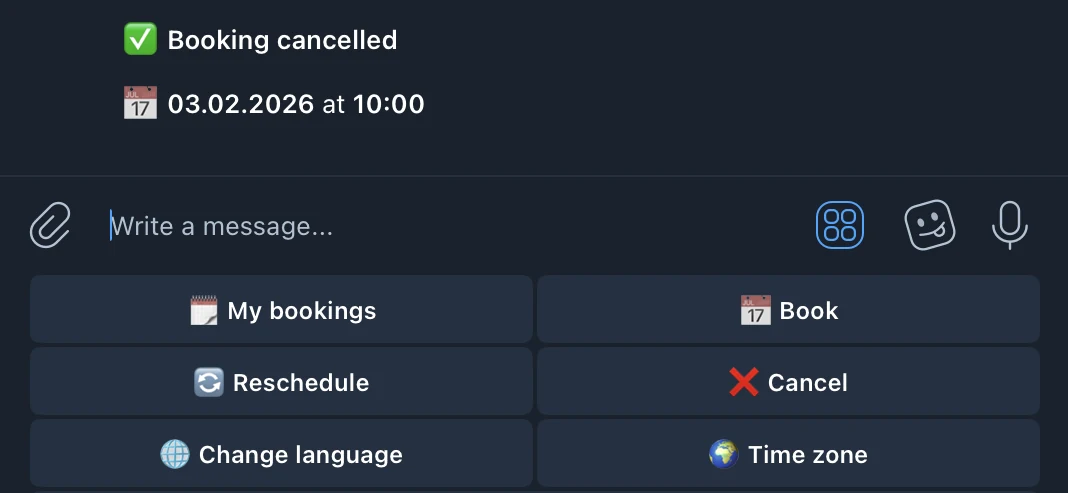
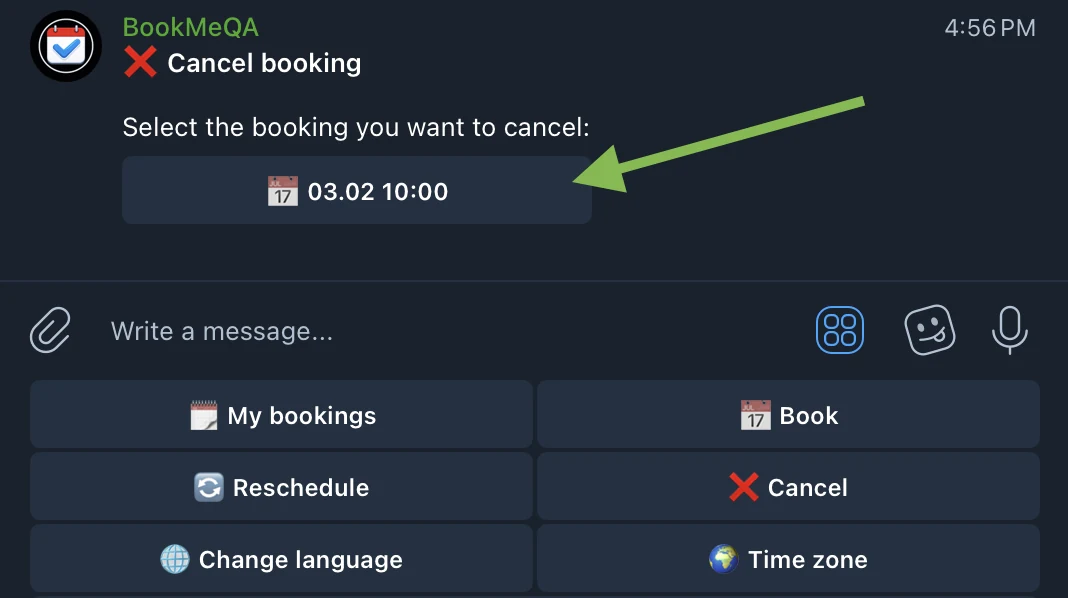
❌ Cancel booking
1 Tap "❌ Cancel" in the menu and select the booking you want to cancel.
2 Enter the cancellation reason — the specialist will see it in the notification.
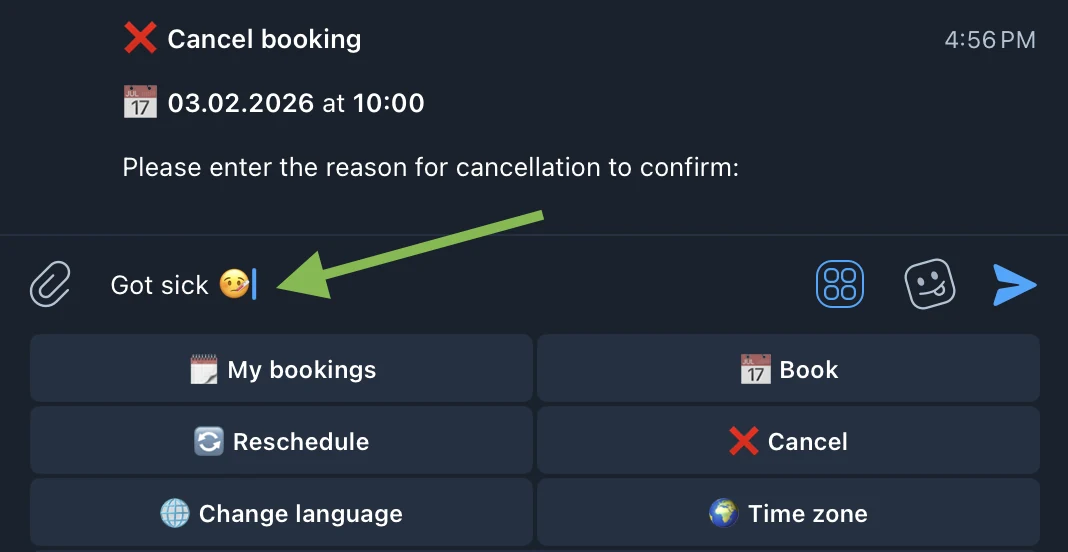
3 Done! Booking cancelled.